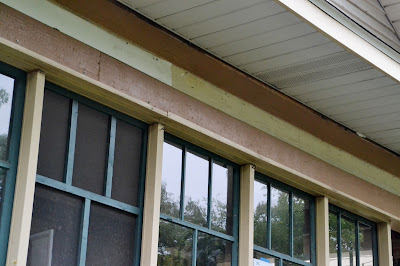
In order to understand some of the opportunities we have with restoring our home's exterior woodwork, I took some time to put together the research I have about the home and looked more carefully at the neighboring structures. At first glance, the structures may seem unremarkable. They are modest structures that have changed over the hundred years since they were first built. Some have been muddled beyond recognition and others have been carefully maintained. Closer inspection reveals a wide array of architectural details within a set building format or bungalow "theme". This gives the neighborhood a distinct character and visual cohesion.

There are thirty of these bungalows, on two blocks on Ridgeland Avenue, in Oak Park's
Frank Lloyd Wright Prairie School of Architecture Historic District. They were all built by Raymond Hancock. Hancock built hundreds of these types of homes in Oak Park and the city of Chicago. He advertised himself as the "largest developer of bungalows in Chicago". It is unclear if this was advertising showmanship, but he did have offices on the north and south sides of Oak Park, on the South Side of Chicago in the Gage Park neighborhood, and in the Austin neighborhood of Chicago, just east Oak Park so there may have been some truth to his claim. This particular group of Oak Park homes were constructed starting in 1915 and finished in the following two years.

One of Hancock's marketing ideas was to give the owner a hand in the design decisions that went into the home. While the advertisements boasted amenities like cement basements, laundry tubs, and elaborate sideboards, many of the elements on the exterior of the home could be customized. Prospective owners could choose the style of bungalow and embellish it with brackets, various materials, and column styles. Hancock was able to maintain a standardized production method for his homes with almost identical floor plans, but also offer the variety and personal appeal that new homeowners wanted.
There are three primary styles of Hancock home that are found in the historic district; a front gable a side gable, and a hipped roof. Those with side gables and hipped roofs have a variety of front dormers. Those with front gables have different expressions of the gable depending on whether it had a full second floor or a smaller attic space.
 |
| Side gable Hancock home with a front dormer. The dormer with three windows, exposed rafters, rafter tails and brackets. |
 |
| Front gable Hancock home with center window and brackets with intact eave beadboard soffit. |
 |
| Front gable Hancock home with shingles above three windows, tongue and groove eave and brackets. |
In addition to the stylistic varieties offered by the gable placement and number of rooms, each detail of the home was also customized. All of the homes have distinctive columns supporting the front of the home or flanking the front porch. Some run from the ground to the eave, others from the ground to a freize board and others are only the height of the adjacent windows. Ours happen to be stucco, a very unique feature for the street as many of the others are wood.
 |
| This is me ripping the aluminum siding off of the top of our front columns to reveal the cove molding. |
 |
| A wood column the same height as the adjacent windows. |
 |
| A wood column the same height as adjacent windows but with a suggested clapboard-clad pier below. |
 |
| A full-height wood column from the ground to a freizeboard. |
 |
| A column clad with beadboard and a wood pier below. |
Almost all of the dining rooms are given a more gratious interior appearance by a side bay window. There are both angled and square bays. Some extend to the eaves and some have their own roof. They provide added interest to the side facades of these homes.
 |
| Side dining room bay with dorner moulding, banding and brackets and exposed rafters above. |
 |
| Side dining room bay with dorner moulding, banding and brackets and exposed rafters above. |
 |
| Our side bay is tucked under our eave and it doesn't appear like it had any detail or brackets. The skirt moulding, just above the bottom trim board was removed before they put on the siding though. We will have to replace that. |
The amount of detail on these relatively modest homes is surprising. Many of the more overtly "Craftsman Style" homes with exposed rafters and and bracketing are intact but very few of the soffited eaves exist in their original state. These eaves were clad with beadboard and had an intricate cove molding along the fascia and a small quarter-round trim towards against the main house. Our home had a soffited eave.
 |
| View of a soffited eave on a stucco home. |
 |
View of a soffited eave with beadboard on a central dormer.
|
 |
| We know there is beadboard under our eaves because we still have it in our porch. The eave restoration is the part of this project that gives me the most angst. |
Though many of the homes on the street have been severely altered and have lost many of their details, there are still many that appear to be lovingly cared for. and retain much of their historic integrity. To my fortune, this will be my "library" as I move ahead with more work restoring the outside of my home.
 |
| Hopefully it won't be too long before the Tiny Oak Park Bungalow is a great example of historic restoration. |


