Showing posts with label wood refinishing. Show all posts

Tuesday, April 25, 2017

The Hall Part 3 - Building the mirror and coat rack

When we first moved into the house, we found a dismantled dining room table in the attic. It was made of veneered wood but the wood under the veneer looked pretty nice. I am not sure but it might even be oak. I saved not only because I save everything but because I knew I wanted to use it in a project some day. Another thing that the house came with was an assortment of mirrors.
I thought that this was the perfect project: to build a sort of built-in mirror / hall tree for the front hall. I began by sanding down the wood, removing most of the rough spots and all of the finish.
I made a very simple frame and then stained and finished it in much the same way that I finished the rest of the wood in the house. For the mirror frame finish, I used tung oil instead of the typical varnish though.

What is nice is that the finish allows the character of the wood to come through but there is also quite a bit of distress visible from its former use as a table top.

I mounted the mirror in the frame and then mounted it to the wall with butterfly anchors. Two screws are also installed, top and bottom, through a stud in the middle of the wall. It is very sturdy and isn't going anywhere.
I used brash washers and screws for mounting so it has a simple yet classic detail.
I was originally fretting over getting expensive fancy hooks from one of the restoration companies but couldn't choose so I ended up at Home Depot and bought something inexpensive instead. I installed two hooks on either side of the mirror for coats and two double-hooks at the bottom for keys and umbrellas.


I am ultimately happy with the hook choice. Hopefully this will keep stray jackets off of the furniture as well!
I finished out the room by hanging one of the prints that I made last summer. It is great to have this room finished!

The Hall Part 2 - finishing and painting

The finishing work was fairly simple. Like the rest of the woodwork in the house, I have it stained and varnished. I chose the colors for the hall some time ago but it took me a while to sort through the hundred or so cans of paint in my cellar to find the two that I chose.
There are two colors, though they are very close shades of gold. I painted the area below the chair rail a little darker than the color above the chair rail.  

Overall, the hall looks great and it is nice to have a finished entry to the house.

Sunday, April 23, 2017

The Hall Part 1- You would think such a small room wouldn't be such a big project

I don't know why I waited so long to start this project. It is a small room and should be pretty quick, right? The problem is: when I did the wood cleaning and refinishing throughout the rest of the house, I quickly learned how difficult it was to strip doorways. Though this is a small room, it has two doorways. I also knew that I wanted to create a built-in mirror/coat rack in this room so it would take a bit more time. 
 After we moved in, we bought a wardrobe and placed it in the front hall to store coats. Before moving it in, I had taped an outline of where I wanted a future mirror to be. Of course, when I pulled out the wardrobe, the tape, from ten years ago, was still there.
The room had other issues too. There was pealing canvassed walls and cracking plaster that needed repair. I decided not to fuss with these elements all that much and just did a plaster patch and repaint over the papered and plastered areas.

The wood in this room was much like the rest of the wood ocne was in the house: splattered with paint, poorly stripped, dirty and all around crappy-looking. I spent quite a bit of time with the denatured alcohol and steel wool cleaning it all up.


The door was a particular challenge because it has quite a bit of detail. I cleaned out the lambs tongue molding and made some minor repairs to the door. 

I then stained all of the wood and this room in much the same way that I stained the wood throughout the rest of the house. I followed up with a varnish over everything.


Tuesday, December 13, 2011

The final varnish

I started putting the final coats of varnish on the doors on the built-in and have the built-in all reassembled.  I should be "finished" tomorrow.  I've already started playing with pieces of the mural I have been working on.  I am plotting out how light or dark it will be and how I will paint the scenes.  I hung a chunk of the photoshop image up today and like how it looks.  I probably won't tackle that until January as I have a lot of finishing touches to do to the rest of the room before I take on that huge project.

Sunday, December 11, 2011

Down the Home Stretch

I am down to the last bit of refinishing on the buffet and have started working through the finishing touches in the dining room.  I am really happy with how the varnish looks on the buffet.
It makes the woodwork look very rich.  The only down-side to the glossy surface is that a little bit of the detail is lost in the sheen but overall, I prefer this finish to the previous or a matte one.
I don't like how the second coat of varnish went on.  There must have been some additional dust or something in the air as there are many tiny lint or dust bumps in the final surface.  I am not sure what to do about it without going over with one more coat.  I am not going to touch it for the time being though. 
The doors are the last piece of the room to get finished.  I worked on these separately.  The darker finish actually brings out the detail in the glass quite a bit on these. 

The finishing touches will come in the next few days.  I have to re-install all the hardware and doors on the buffet.  I also have some painting touch up to do.  There is work to do on the main dining room light fixture too.  I want to re-set or replace the electrical box it hangs from as it hangs too low and there is currently a slight gap between the fixture and the ceiling.  I also purchased new cover plates and switches to make them all match.  I am now having second thoughts and may purchase the classic-looking two-push button switches instead.  I am not sure if these would have been original to the home but I think they would make for a nice detail in the dining and living rooms.

Sunday, December 04, 2011

Taking a hiatus from stripping until after the holidays

The final piece of work in the living and dining room that was left undone before thatnksgiving was stripping anad refinishing the built-in.  This week I took it apart and began that work.  I finished the stripping yesterday and am "done" with that aspect of the work in the two rooms.  Now that I've perfected my method, I will pick up on finishing the two hallways early next year.
The built-in was more difficult than other parts of the room because there is a lot of detail to it and it has a lot of moving parts.  I had to take off the art glass doors, clean up the capitals, and also remove the drawers so they could be done. 


After one coat of stain, it looks pretty good.  I should be able to finish a second coat later today.   
Working so closely on the wood in the house, I have found tons of mistakes made by the original carpenters and POs.  The hatchet job the PO did on removing all of the trim, "stripping" it and then bashing it back into place left many broken and splintered pieces of trim.  I spent about two hours fixing one small section and wish I had the patience to do the entire house but it probably would extend this project to a 12 month project as opposed to a one month one.  The glass doors to the cabinets were installed wrong - or better, they were each installed differently: one with the trim facing the inside of the cabinet and one facing outside.  I never noticed this before so doubt others would as well.  There are also some water stains here and there that I couldn't get out of the wood, no matter how much I bleached or sanded them.      
The drawer hardware is my latest beef.  It is a minor issue but one that will gnaw at me.  The PO installed new hardware that was different from the original rectangular-stock hardware.  You can still see the ghost of the original hardware on the drawers (below).  The new hardware has a round escutcheon behind each pull post.  Also, the new hardware has mounting screws that are closer together than the original so a new hole had to be drilled for them.  Of course, the PO couldn't drill them neatly and evenly so they are all over the place. Or, God forbid, find some hardware that matched the original mounting holes.  I don't hate the the new reproduction hardware enough to remove it but I don't love it either and would like something simpler and  I wish I knew what was originally on the buffet.  For now, I am going to live with it.  
I should be wrapping this project up this week.  It will be finished except for the mural I will be painting above the high dado.  I'll post on that separately.  Now that it is almost done, it is hard to remember how bad the wood originally was.  I bet most folks that come to the house will say, "I thought it looked fine before, what changed?"   As a reminder, I feel like printing and framing the photo below and hanging it in my dining room so that folks can be reminded of how bad it used to be.
   

Sunday, November 13, 2011

Stripping ceiling beams sucks...

...thank God they were never painted.   I feel like I've gotten nowhere.  I've spent over 13 hours on the ceiling and am about half done.  It is going to be an ugly week if I hope to complete it all by the weekend.
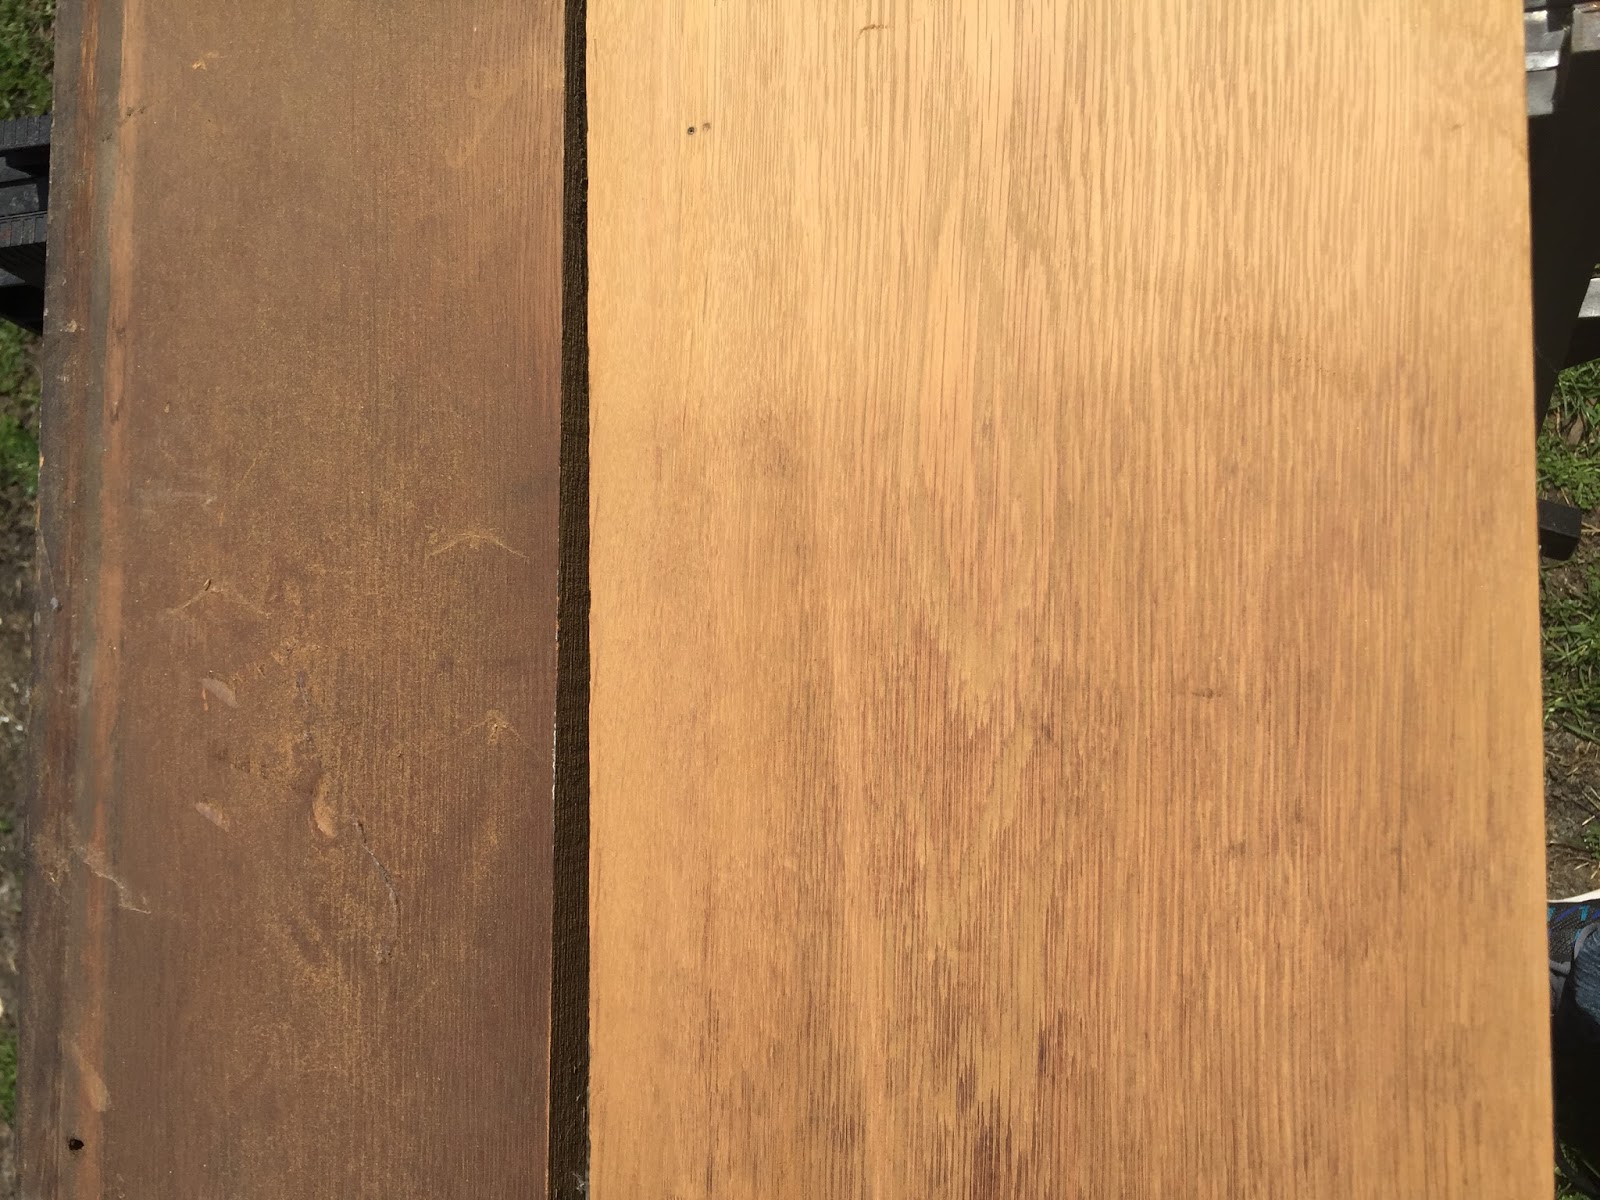
The "work" that was previously done on the woodwork at the ceiling is probably the worst in the room.  It seems to make sense: it is not easy to get at and it has a lot of compound pieces so it is a bitch to work on.  Below is an image of, on the right: a piece I already cleaned and stripped and on the left: a piece I haven't worked on.  The difference is more remarkable than the cleaned wood in the living room. 
Meanwhile, we've moved the dining table into the living room.  I like the change so far.