Showing posts with label wood trim. Show all posts

Sunday, November 13, 2011

The "First Coat"

I started applying the final finish the other morning and then quickly realized that things weren't quite right.  I didn't like the color.  It still seemed a little light so I quickly stripped the small section of wood that I started finishing and quickly applied an additional coat of stain to the entire room.  This added a little more time to the project but I think it was worth it.  When I put on the final coat, a linseed oil based varnish, it seemed to lighten to wood a bit and it needed a little more color depth.   
So far, I am happy with the look.  It is VERY glossy and the wood looks good.  I will be adding one more coat of varnish and then, depending on how things look, I may wait a couple weeks and then knock down the sheen with some steel wool. 
For the final finish, my woodworking guru, Jeff at Oak Brothers, gave me several suggestions.  One seemed interesting to me because it was touted for its "green-ness".  It is a varnish called "Le Tonkinois".  I believe it was formulated for boats so I am sure it will last a long time.  I put it on with a sponge brush and am really happy with it.  Besides tung oil, it may be the nicest stuff I've worked with.  It takes a good 24 hours to dry so the finish ends up being very even and it is not prone to dripping.  Any noticeable dripping can be easily re-touched even an hour or so after you apply it.   It supposedly contains no VOC's.  This should not be confused with it not having an odor because the stuff is actually pretty strong, odor-wise.  I also chose the gloss version as I was unsure of how I wanted the final finish to look.  The original finish had a bit of gloss to it so I figured I would start there and manipulate it later if I needed.  Once the finish is done, I would have put three coats of stain and two coats of varnish on the wood.          
The difference between the finished and unfinished parts of the rooms is remarkable.  Now that I have the finish on, I can start on the next room.
 
The dining room, with its beamed ceiling and huge built-in, is probably going to take a bit more time than the living room.  I got to work on the ceiling beams yesterday and it is taking quite a bit of time.  These were not stripped as well as any other parts of the house so there is a lot of shellac to take off.  The edges of the cove molding, at the ceiling, have also been painted over about a hundred times so I am scraping all of the old paint to create a crisp an edge as possible within each ceiling section.  Not fun.    
With any luck. I will be putting stain on the ceiling in a couple days.  This will make the schedule for painting to likely start on Saturday or Sunday.  I also hadn't mentioned: the glass shades that I ordered for the dining room light fixture are ready.  I am going to be traveling to the artist's studio, in Wisconsin, next week to pick them up.  I'll reserve a special blog entry for this one. 


Saturday, October 22, 2011

Refinishing the woodwork Part 1

I mentioned in a previous blog that while at an opening reception for a restored room at a local historic home, I started discussing my DIY work on the Tiny Bungalow with a wood restoration expert.  Earlier this week, the gentleman I was writing about, Jeff Ediger of Oak Brothers, wrote me a description of what he would recommend for restoring my woodwork.  It was eye opening.  He treated this subject with such a particular and detailed point of view, I figured it was well worth taking his advice.

My intent is to end up with woodwork that is a close approximation of what might have been in the home originally.  Without going through the painstaking effort of restoring the original shellac, I am going to do something a little different but hopefully just as beautiful.  

Jeff's first recommendation was to get the wood as clean as possible.  His directions were very specific: the brand of denatured alcohol, the brand of brass brushes and even the brand of paper towels.  "They must be Bounty".  I like how this guy thinks and it is not unlike my own way of dealing with my design detailing, my cooking, and my selection of beer.   I completely understand that when someone with this level of knowledge presents "the only way" to do something, it is probably best to follow every detail.    
After assembling the supplies, I began by applying the denatured alcohol to the wood and brushing it to remove any remaining shellac.  Jeff mentioned that this helps to remove some of the original analine dye that was originally applied to the wood almost 100 years ago also.  When I did this, some of the residue wiped off with a paper towel but a lot of it also fell off, in crumbs onto the floor. 
I've spent about three hours so far and have only completed two baseboards but there is a noticeable improvement.  The result is a more homogeneous finish and no more "shiny spots" where the PO didn't complete the shellac removal.  There are still a lot of small dents and imperfections in the wood but since the pieces have the wear and tear of 100 years on them, I guess that's to be expected.   
 BEFORE (ABOVE)
AFTER (BELOW)
I am going to spend the next day continuing this process.  I am also going to take a step that Jeff did not suggest but that I figure may help.  I am going to go over everything once more with some steel wool soaked in denatured alcohol.  I think this will help as a final cleaning before I begin the staining.  I will feature the next step (staining) in a subsequent blog.  

Sunday, November 02, 2008

Some things just don't turn out the way you envisioned them.

I think I perfected my pipe cleaner animal making this weekend. Eat your heart out, Martha! Pipe cleaner animals aside, believe it or not, it was actually a very busy weekend at the Tiny Bungalow: pulling in all of the outdoor pots and plants, bringing in the patio table and chairs, general cleaning of the yard and garden, trying to teach myself some linoleum printing techniques. In addition to this stuff, I actually tackled some "real" projects too.

I don't know if anyone recalls but some time ago, I made a table for the bedroom. It was done, right? Well, wrong, it may have looked complete but it wobbled and the top was never secured to the base properly. Yesterday, I couldn't leave well enough alone and I took the table apart to try and fix my shoddy craftsmanship. I had moderate success. The table still wobbles but much less than it did and the cross pieces are now nice and even - so it looks good. I also created some notches in the top to install some table-top fasteners and I fastened the top to the legs so the project is all in one piece - no more knocking the top off while reaching for the alarm clock!I had less success with the basement soffit (or anti-soffit), I finished demo on the framing and gyp board and I am going to keep the duct, beam, and pipes exposed - remember, I'm 6'-4" and height is a key here. It doesn't look great but hopefully when I paint everything out, it will look better. The issue I have been working through is how to trim out the "cut" ends of the soffit. On one side, I put in new blocking and then put in 1x pine trim, similar to the rest of the basement. I will eventually stain it to match the rest of the basement trim as well. There are still too many issues here: I hate the wires and need to figure out what do do with them. I am also not completely satisfied with the trim, maybe I need bigger pieces to conceal more, and I also need to get more ceiling strips for this area. It is slowly coming together but it isn't coming out quite the way I wanted. I keep telling myself it is just the basement - but it would be nice to get at least one area of the house "finished". Then there's the opposite side of the demoed soffit - the door to the "shop area" of the basement. What the hell do I do here? I don't want a door and have been living with a curtain. Maybe that's what we'll stay with. I don't know, I have a feeling that this entire project is going to go the way of the table and I will end up re-doing portions of this in a few months - except that this is a much bigger project.

Monday, September 01, 2008

Garage trim finished (pretty much)

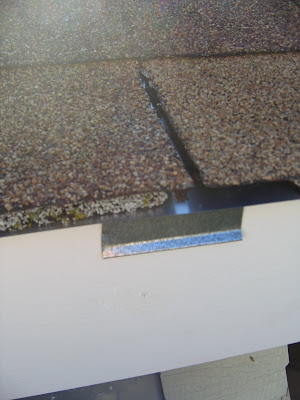
I woke up bright and early to get a start on the day. I began installing the new flashing around 7 and did a quick mock up of how the final flashing and drip edge combo will work. It went pretty quick and I was painting by 9:00. I had enough time to put two coats of paint on the trim and one coat on the trim of the garage door and was finished with work by 2:00 - wow, I might even get to enjoy the rest of the day! I'll save the rest (the green for the body o0f the garage and chocolate cherry for the doors) for another time.

I also came up with a "solution" for the screwy rotted paneling and vinyl siding. I ripped everything off at the doors and installed new wood and trim to look like short wainscoting. Yeah, it looks jacked up but it will do. Frankly, what's more jacked up is my 4 year old daughter insisted on helping. In addition to leaving large gobs of paint on the driveway and alley, she painted a hell of a lot more than just the trim. Hopefully this is the last major thing I have to do to the garage until spring.

Sunday, February 24, 2008

Trim complete, table still progressing

I finished the toe molding in the bedroom yesterday. It is odd. The photos suggest that there is a radical difference between the color of the molding and the baseboard. In actuality it's not that different. We used 3/4" quarter round for the molding. This is the size that was there. No, I did not strip the original and replace it - too much of it got ruined in the demo and there were still about a thousand staples per foot in that stuff - it looked like crap.

It is amazing how "finished" this makes the room seem. It also brings attention to all the little things I need to do - like touching up the paint at the edge of the plaster and cleaning the floors and baseboards (there is still some residue from when I washed down the plaster). There is also a splotch where I spilled some stripper and I need to fix that somehow. I figure I can hold off the cleaning and touch-up until the very end.

I put a coat of Cabot's "cherry" stain on the table. It is looking nice. I am going to finish it with a few coats of wipe-on poly and I'll then put on the top. The little gap is still bothering me - I may take it apart once more and try to re-align it but my smarter side is saying leave well enough alone. Hmmmm.

Honing my woodworking skills

The night stand is coming out o.k. I spent the weekend assembling it and sanding it down. There is a slight mis-alignment in the legs but I am not sure I want to take it apart once more to fix it. I feel if I do this, I'll definitely screw it up so I think I might live with the 3/32" inch gap at the cross-pieces. It's annoying because when I fit it together there was no gap - this only occurred when I began screwing the pieces in place. I think that I need some better tools as I believe the "balancing act" I used to assemble didn't work so well.I have been trying to work out a nice finish too. I bought several types of stain and I tried them all out on some scrap wood. I don't like any of them so its off to the hardware store again this morning to find something I like.

The bedroom is also progressing. I stained all of the toe molding and should have it in place before lunch today. I think I am down to about 8 things on my punch list, two of which (a new rug and curtains) I am trying to pawn off on my wife.
I can't wait for the weather to get above freezing so I can begin stripping the final door in the room.

Friday, February 08, 2008

Bedroom painting complete. Well, sort of...

I feel like I have made it over a big hump. The painting in the bedroom is finished except for a few areas where I need to cut in with a small brush at the baseboard. The room is impossible to photograph - one of the sad facts you need to face living in a tiny home. Maybe tomorrow I'll break out my Pentax and get some better shots with a wide-angle lens. Do they still develop film at kodak these days? Anyway, the paint color looks light in the photos but it looks good so I guess you get the idea.
If you look closely, you will notice a lot of the other things that I still need to do to consider the room finished. I have been replacing my switches, outlets, and plates and have more to do on that. That project deserves a separate blog though.

I have a punch list taped to the door for now. Hopefully I'll wrap these things up by next year at this time... ...or at least by the time the tape tackiness wears off and the list falls to the floor and is lost forever.

Tuesday, January 01, 2008

Picture rail complete

I think that the picture rail came out nice. I didn't get to hung up on the corners but after the second one, the coping became easier (they still kind of suck though). It's nice to see the woodwork pretty much done in this room (please ignore the stark white door leaning up against the wall).Hopefully the brass screws begin to patina soon - I may need to do something to accelerate the process. I like the rhythm of the exposed fasteners but they are just a little too "bright" at the moment. I also may get a bit more anal about their position - it would be nice to have the cross mark of the Phillips-heads to be all orthogonal to the rail itself. Frankly, I don't have the patience for this right now.I am excited to get to the painting part but since I've come this far, I am going to take a little more time with the plaster to get it looking better before we paint. We have decided on the room colors too:The Prairie Green (how appropriate, right?) will go on the main walls below the picture rail, and the Silver Wing will go on the ceiling and above the picture rail. There is still a chance I might do Touch of Gray on the ceiling as another accent but I am not sure. There was also some talk of stenciling the dado a while back but I'm not so sure of that either. The real bonus to choosing the paint colors is that I can now take down the 100 or so odd paint swatches that are hanging around the room.

Sunday, December 30, 2007

Why the hell do I need coped corners anyway?

It really makes no sense to me. I spent two hours on one corner and it still doesn't fit together properly. I am a real moron when it comes to this type of woodworking. I watched Norm Abrams knock out some very complicated ceiling molding in a matter of minutes. I am definately no Norm Abrams but I understand the principal and the goal but I just don't have the skill, or patience to get it right. I will spend the rest of the day coping the remaining four corners of the room. In the meantime, I'd love to hear a good explaination on why I should be doing this.